Talos
Talos Omni
Omni Kubernetes Guides
- Log in to Keycloak.
- Create a realm.
- In the upper left corner of the page, select the dropdown where it says master
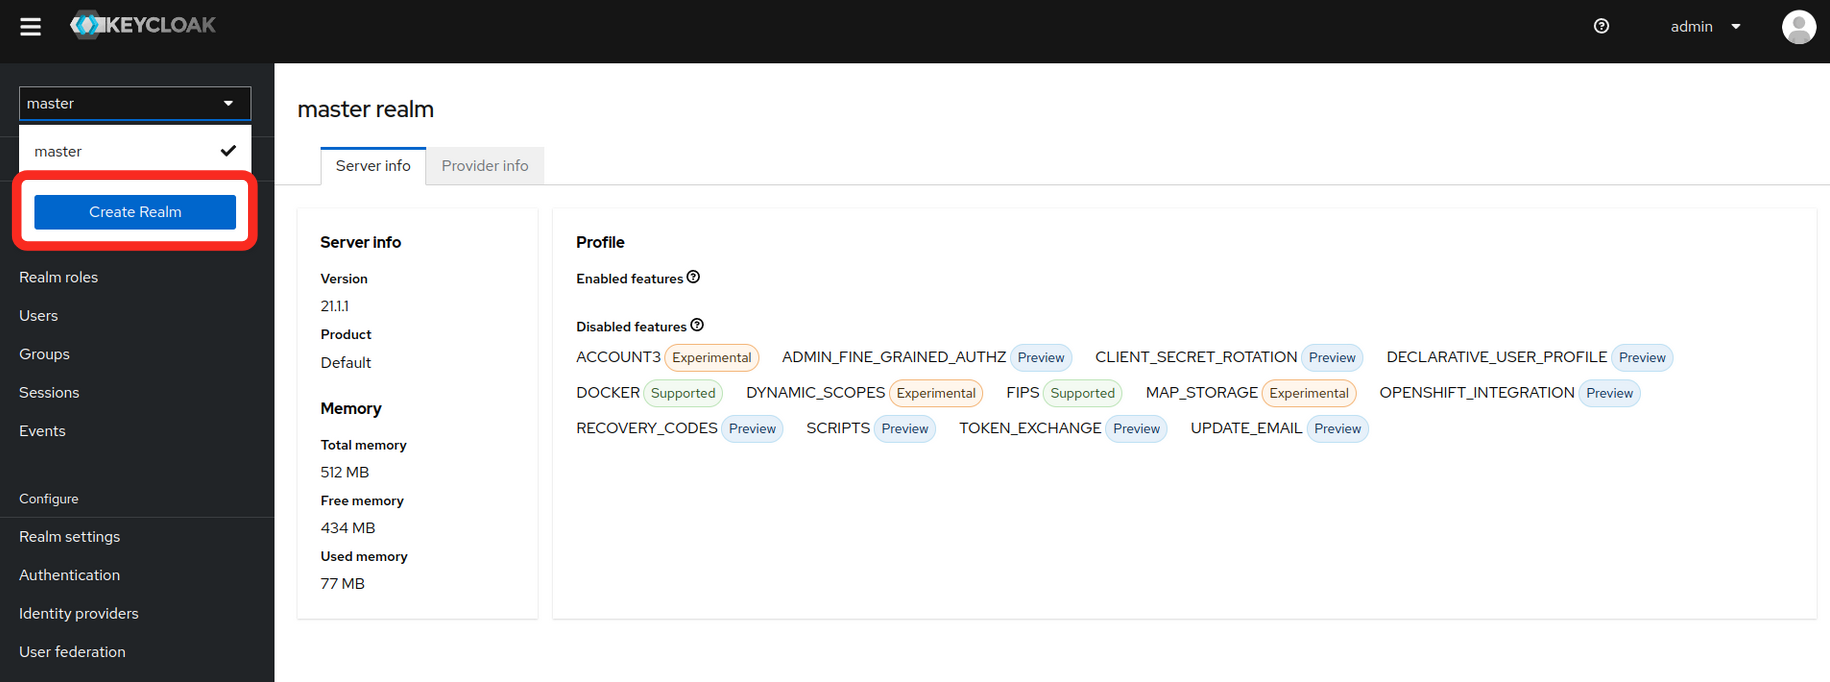
- Fill in the realm name and select create
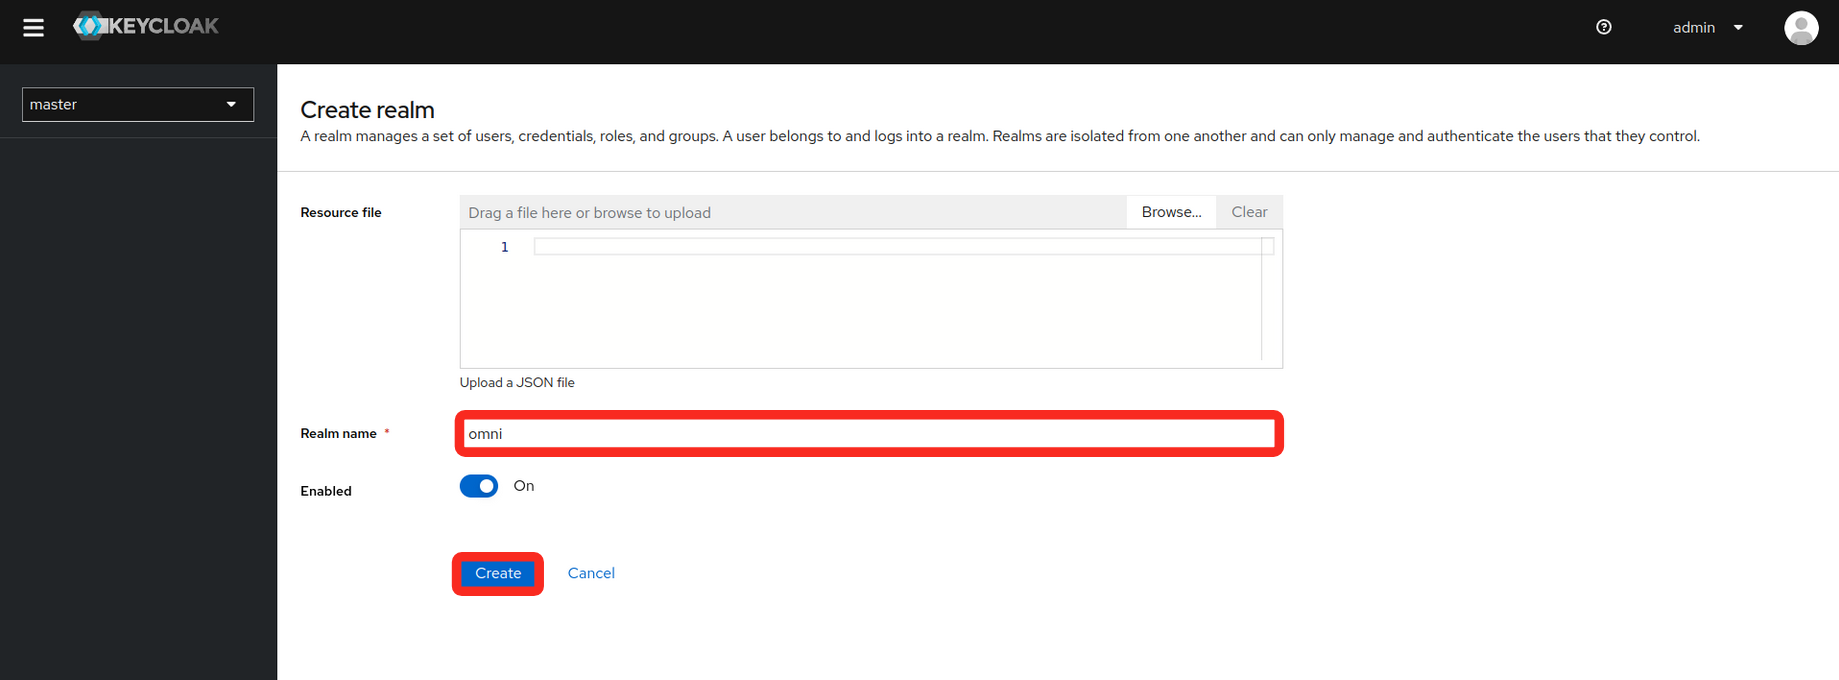
-
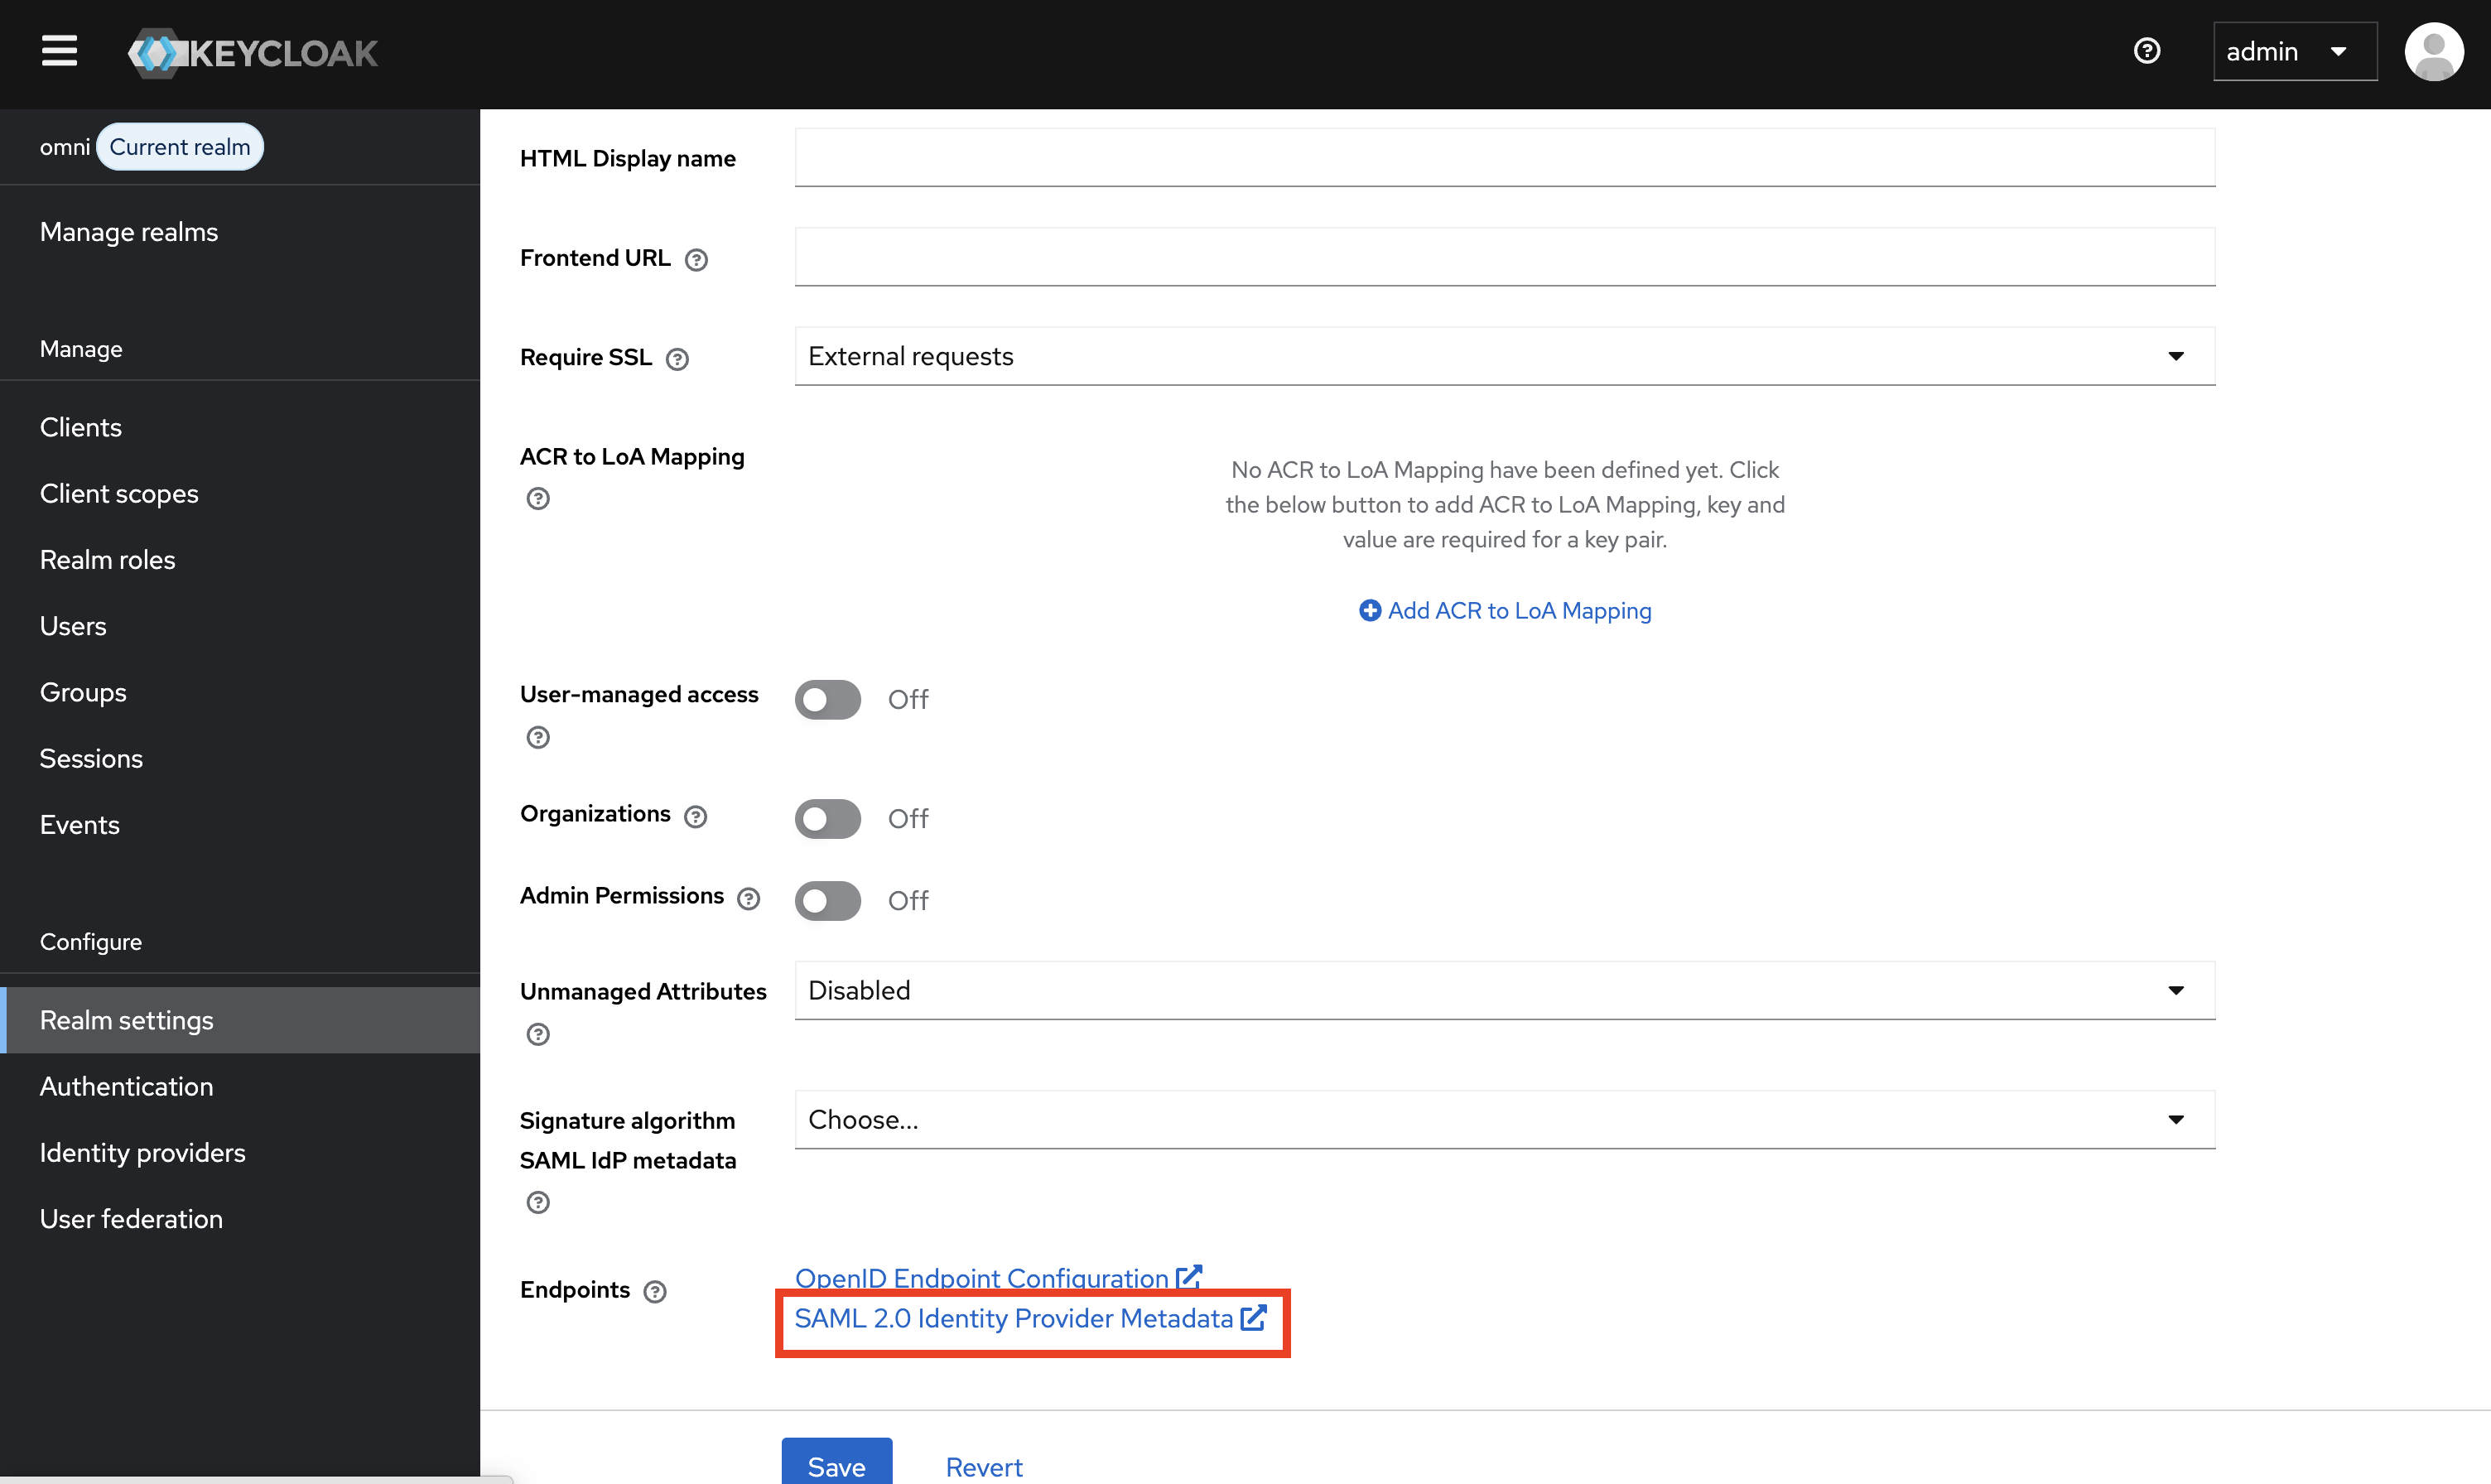
Select Realm settings in the sidebar, and navigate to the Endpoints > SAML 2.0 Identity Provider Metadata Link. The link should look a lot similar to this:
- Copy the link or save its XML data to a file. You will need this for your Omni installation.
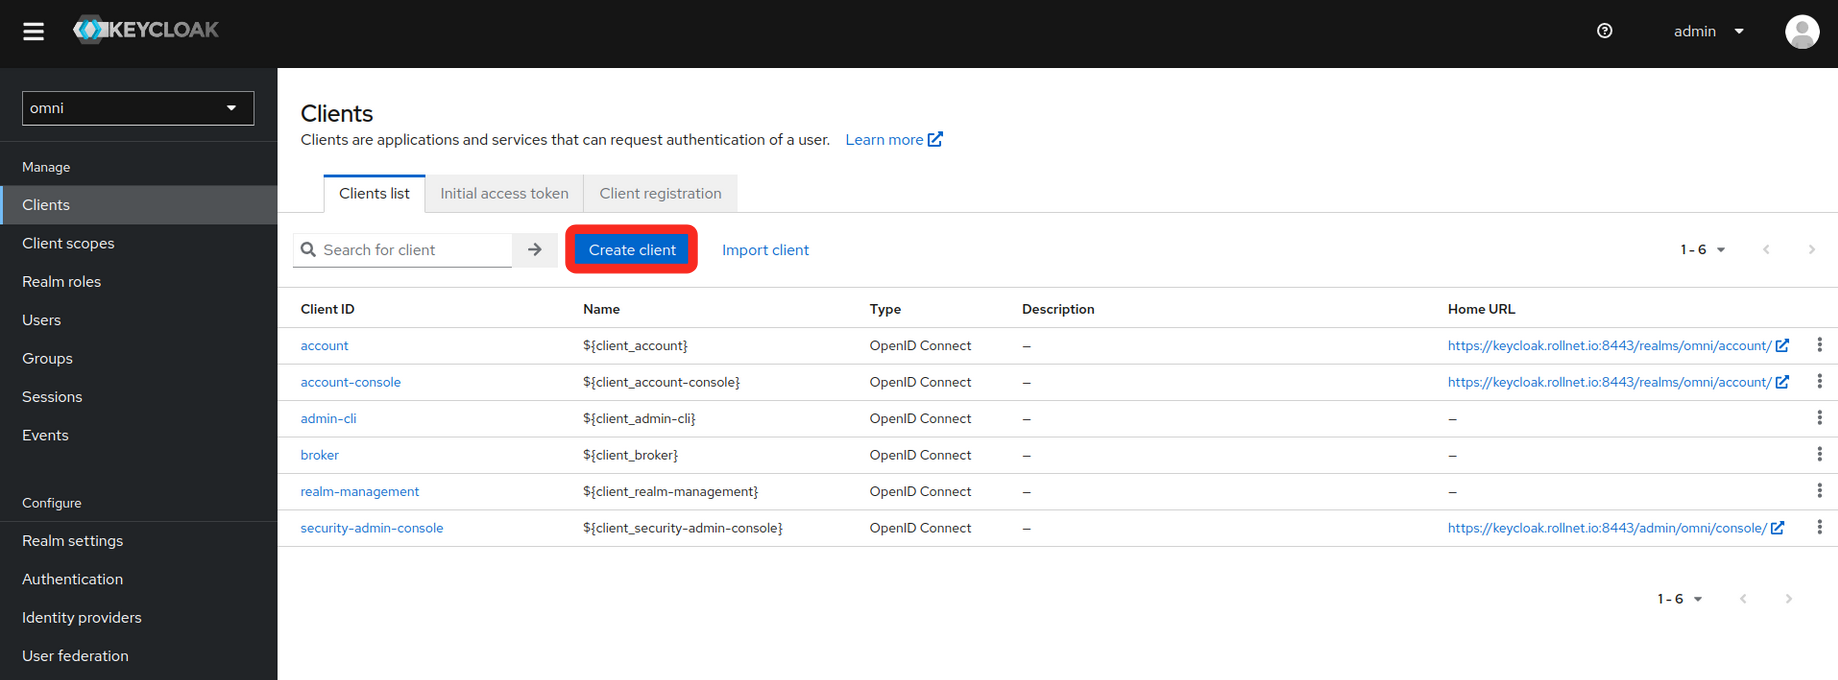
- Create a client
- Select the Clients tab on the left
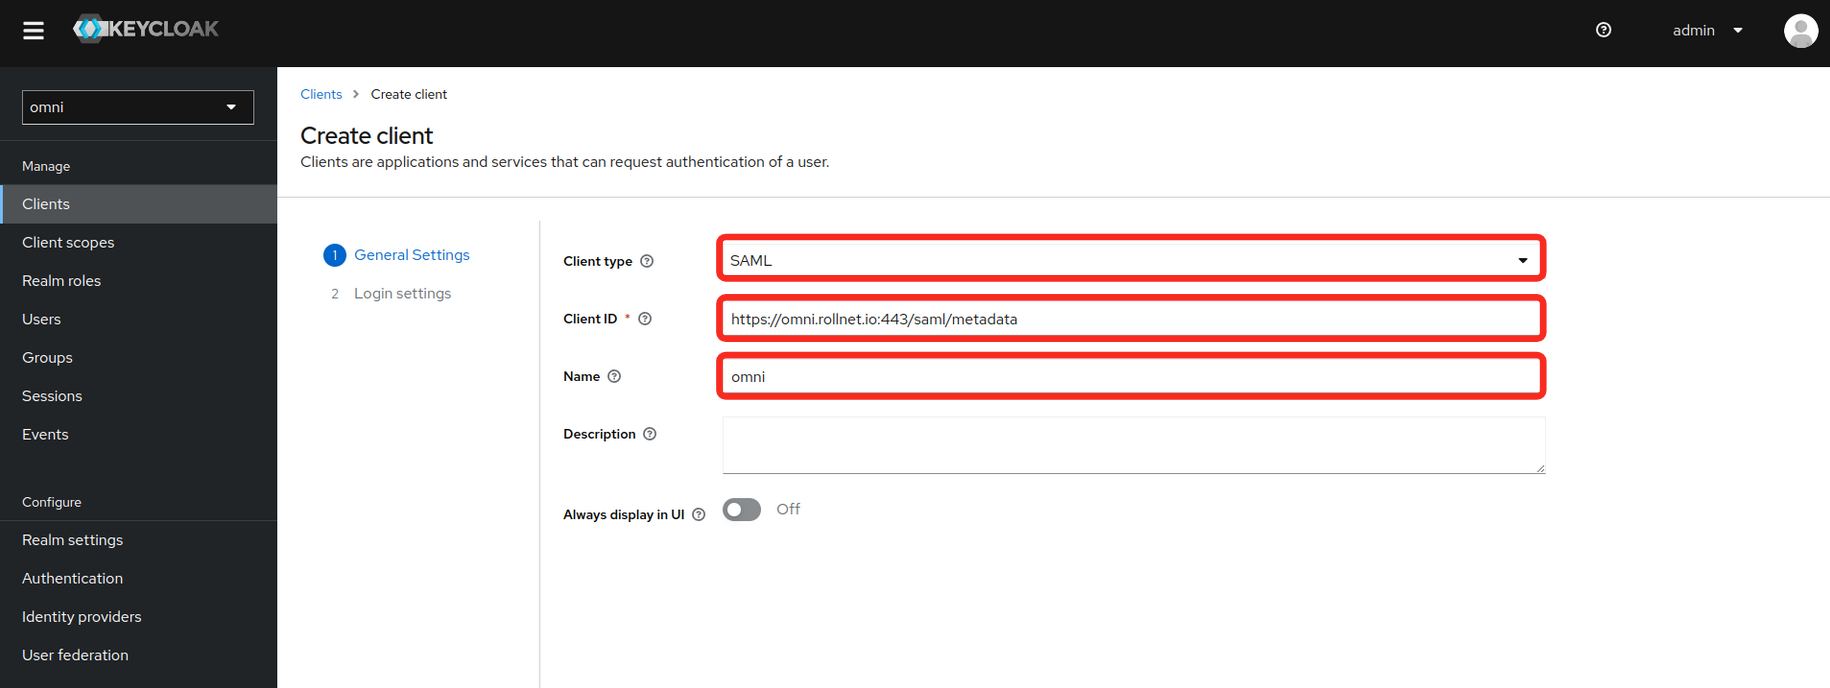
- Fill in the General Settings as shown in the example below. Replace the hostname in the example with your own Omni hostname or IP.
- Client type
- Client ID
- Name
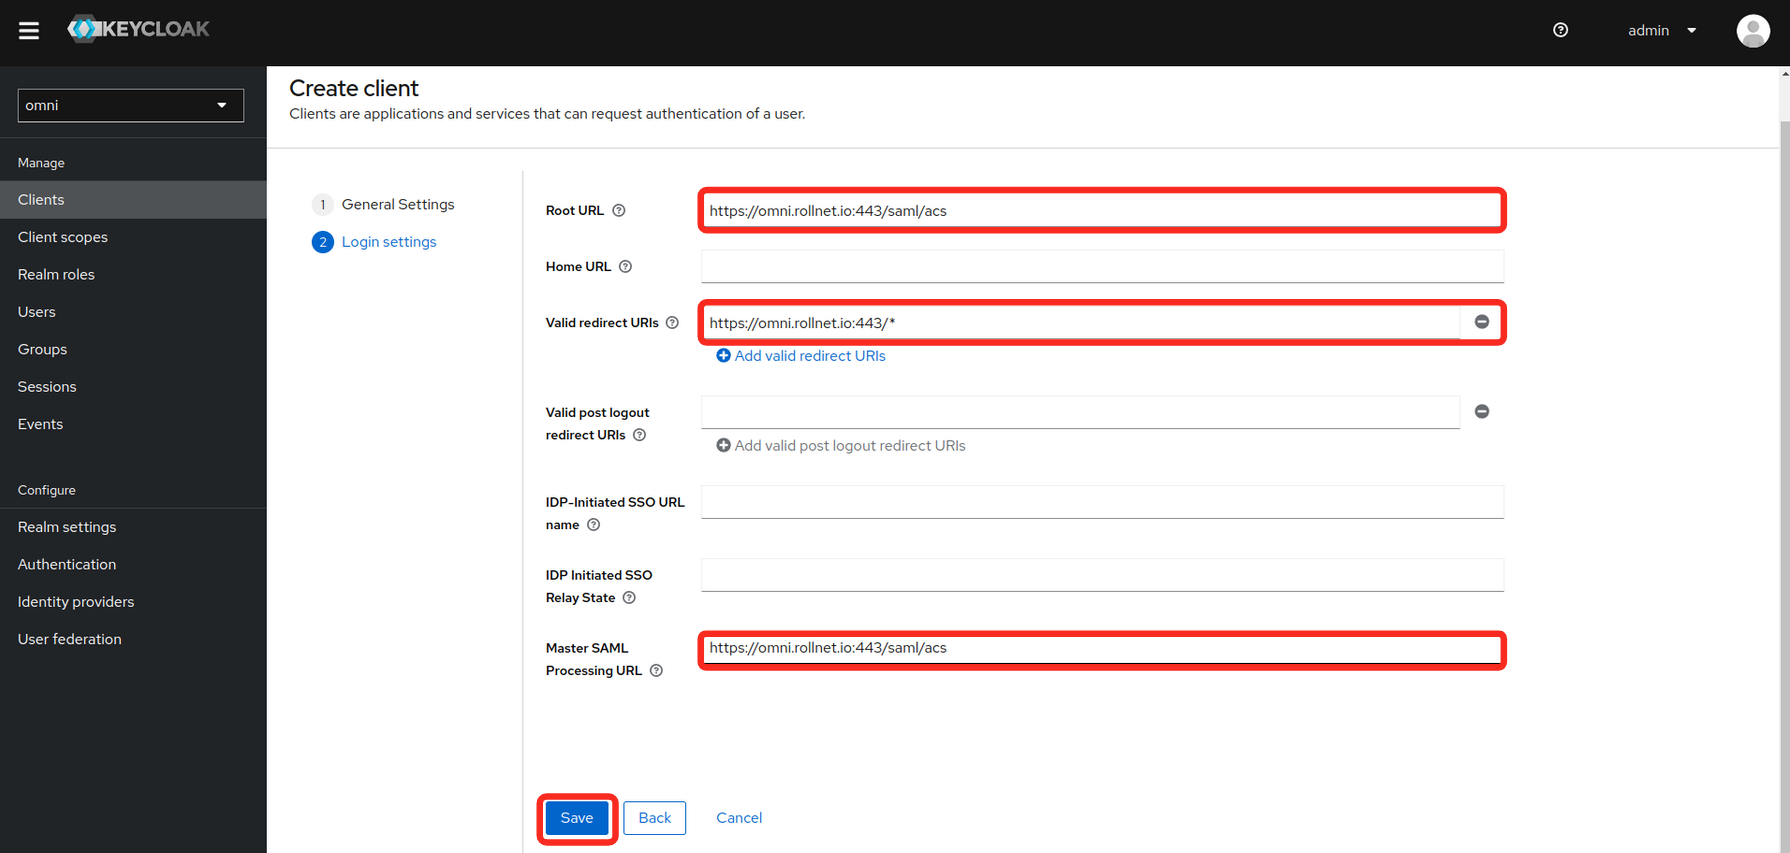
- Fill in the Login settings as shown in the example below. Replace the hostname in the example with your own Omni hostname or IP.
- Root URL
- Valid redirect URIs
- Master SAML Processing URL
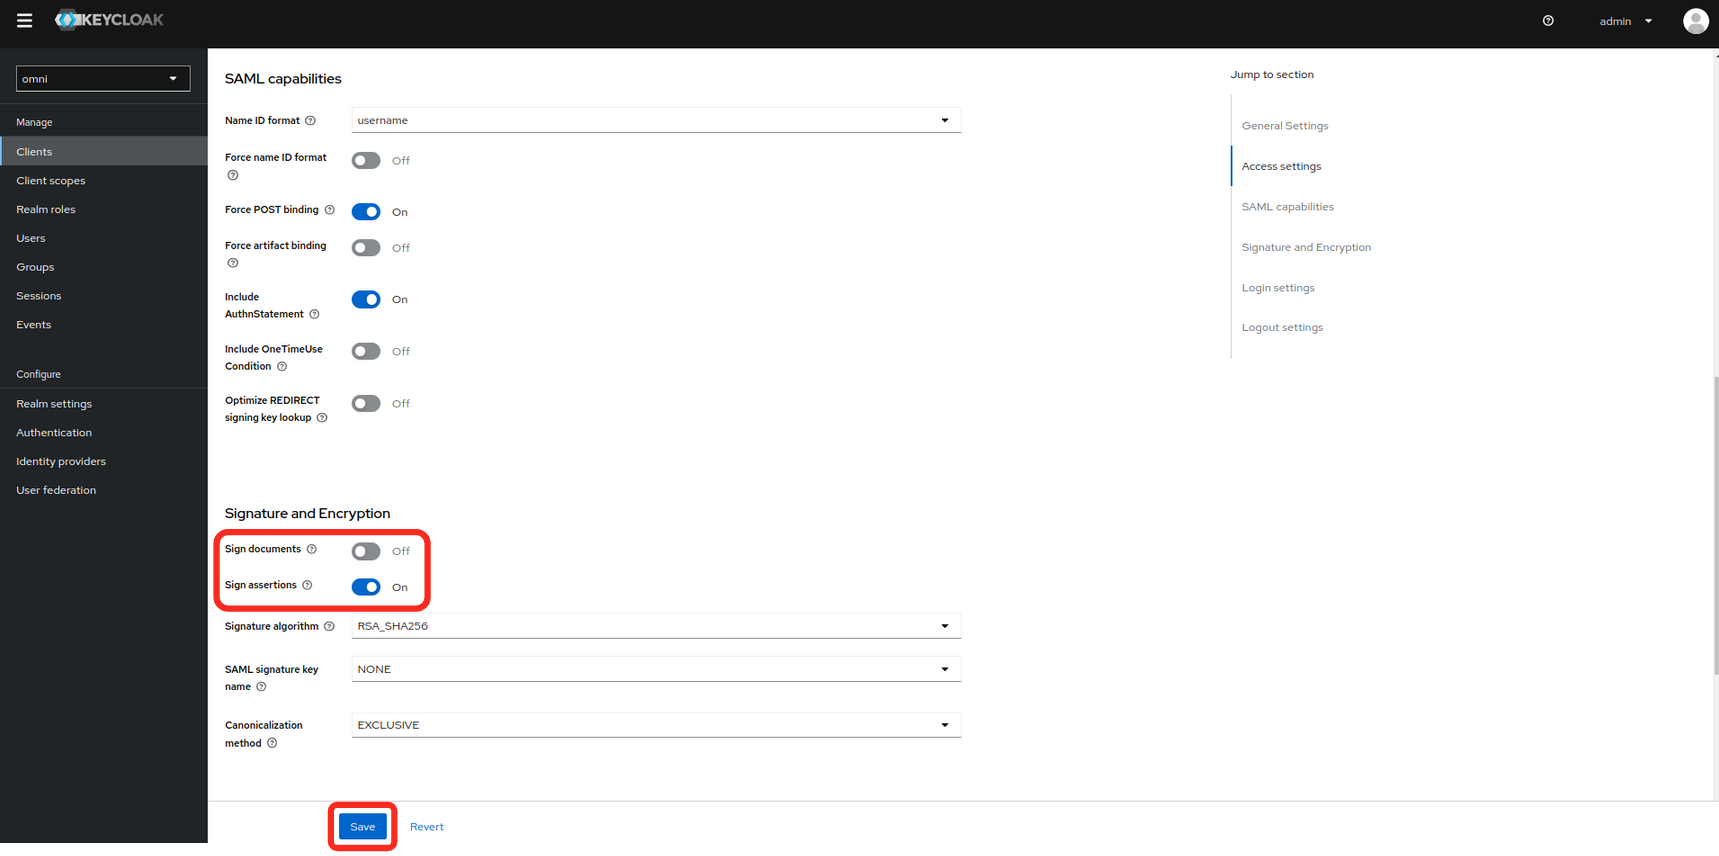
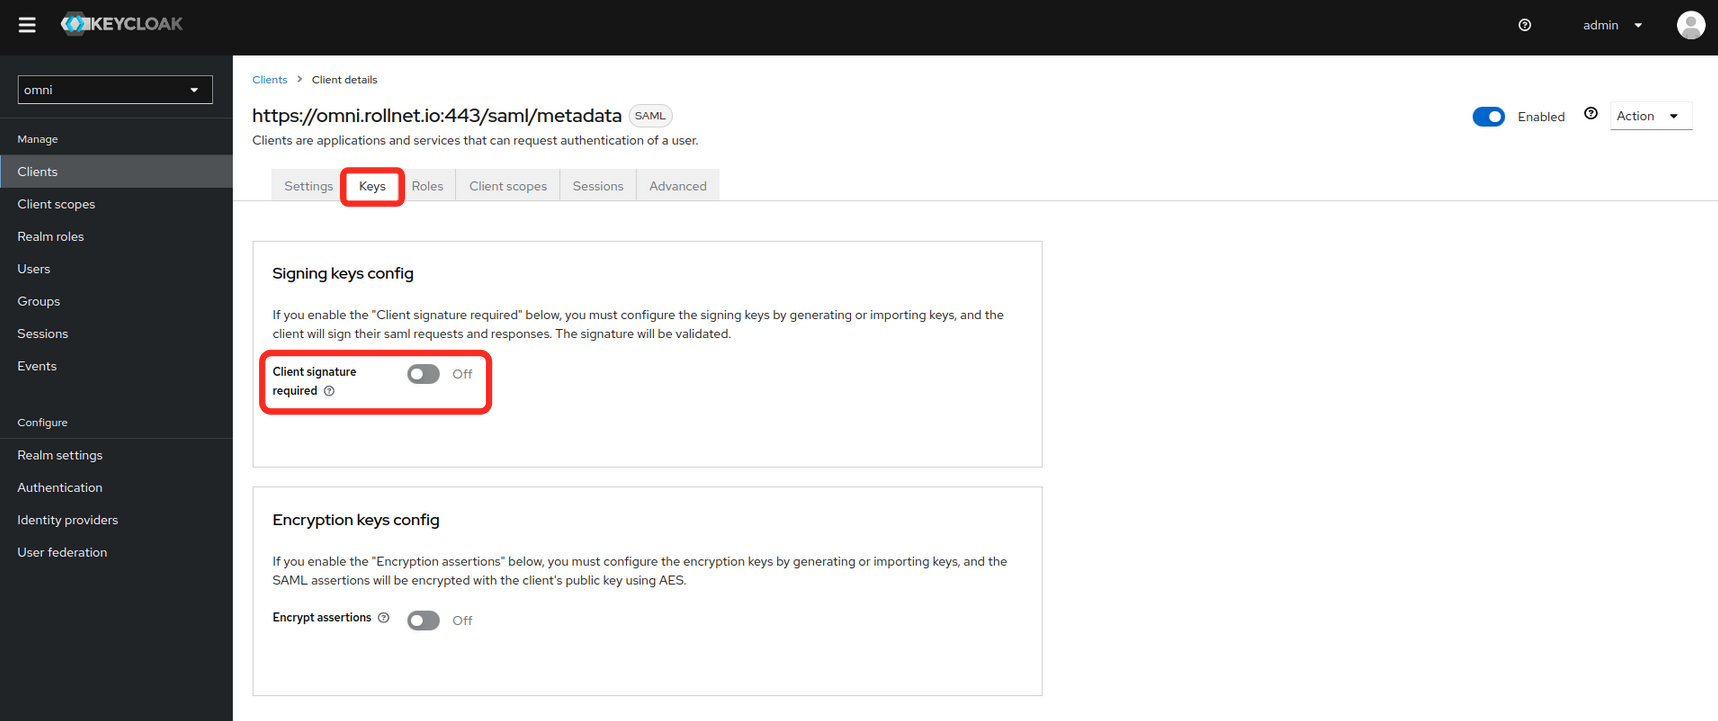
- Modify the Signature and Encryption settings.
- Sign documents: off
- Sign assertions: on
- Set the Client signature required value to off.
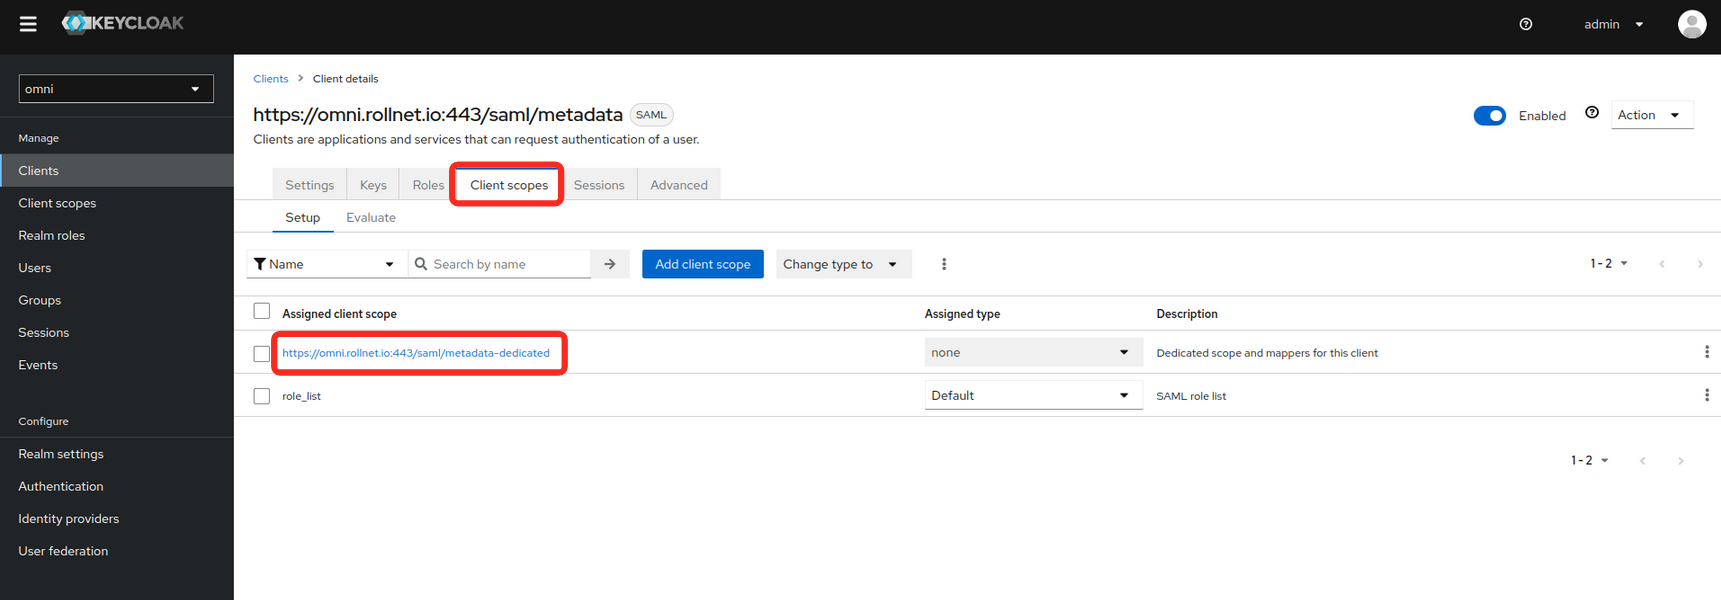
- Modify Client Scopes
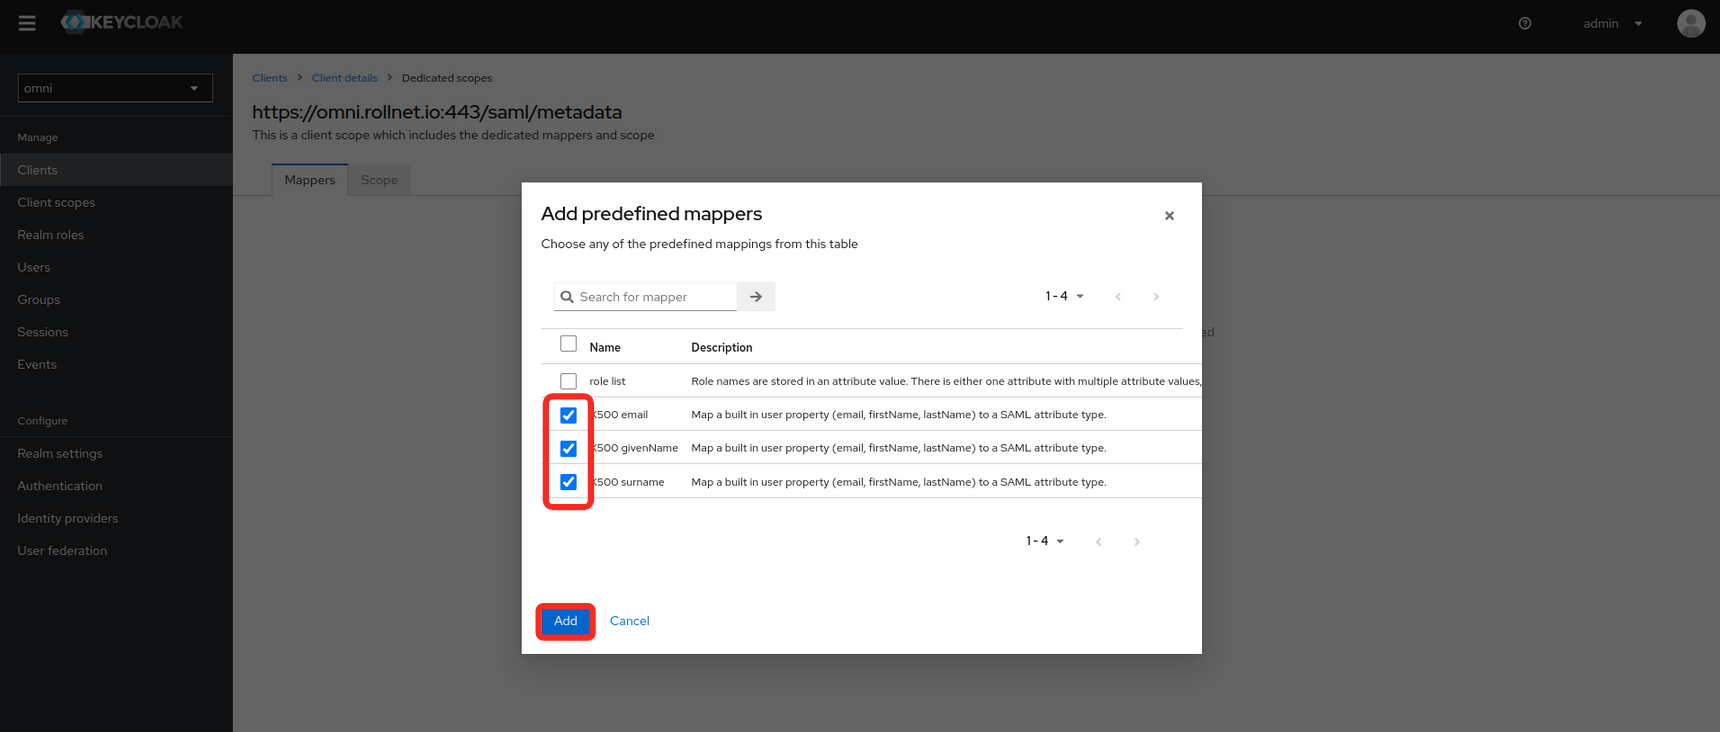
- Select Add predefined mapper.

- The following mappers need to be added because they will be used by Omni will use these attributes for assigning permissions.
- X500 email
- X500 givenName
- X500 surname
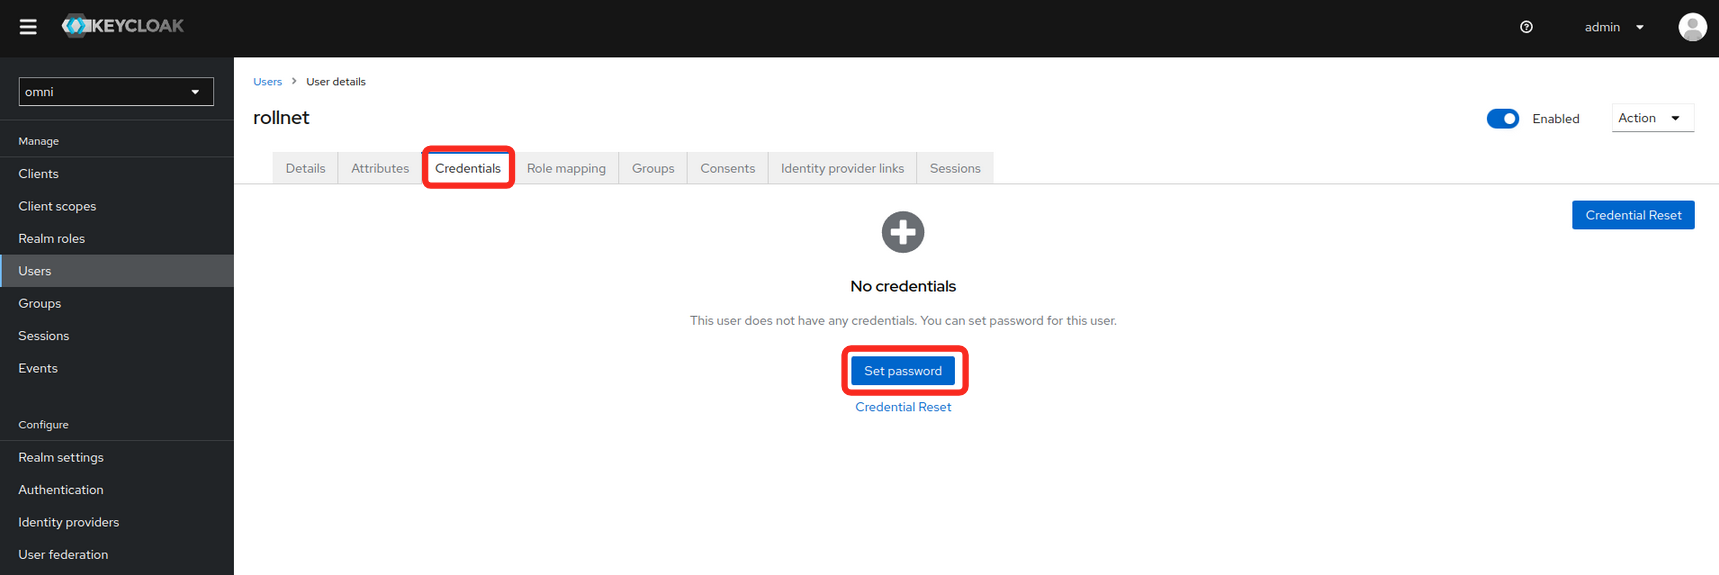
- Add a new user (optional)
- If Keycloak is being used as an Identity Provider, users can be created here.
- Enter the user information and set the Email verified to Yes

- Set a password for the user.